Setting Up Notifications in Your Superblocks App
Enable real-time notifications in your Superblocks app to keep users informed about important events in Weavy components. This guide shows how to connect Weavy's notification system with Superblocks and enable navigation from notifications.
Prerequisites
You will need:
- A Superblocks account with admin rights
- A Superblocks app with installed Weavy components (see Add to Your App)
Step 1: Prepare Your App for Navigation
Design your app with navigation capabilities so users can navigate from notifications back to the source component.
Use Superblocks:
- Multi Page Routes
- Navigation features
- Query parameters connected to UI components
You can explore the Weavy Superblocks demo app for an example implementation with query parameters connected to tabs for different Weavy components.
Step 2: Add setWeavyNavigation Event to Your Pages
For each page with Weavy components:
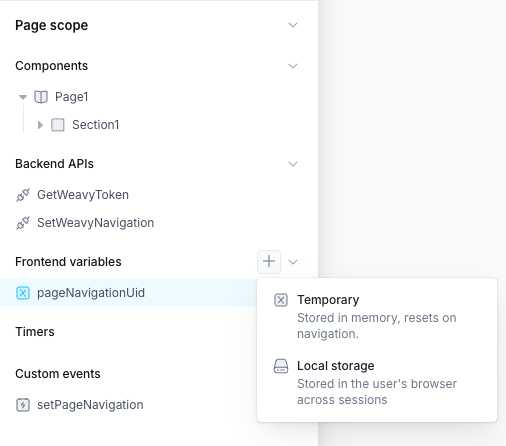
Create a Frontend variable in the page scope:
- Name:
pageNavigationUid - Default value: (leave empty)
- Name:
Create a Custom event in the page scope:
- Name:
setPageNavigation - Add an Argument named
uid
- Name:
- Add event handlers to
setPageNavigation:- Handler 1: Set frontend variable
- Variable:
pageNavigationUid - Value:
{{currentEvent.uid}}
- Variable:
- Handler 2: Run API
- API:
SetWeavyNavigation
- API:
- Handler 1: Set frontend variable
Step 3: Add navigateFromNotification to Your App
Create a global event for handling notification navigation:
Create a Custom event in the app scope:
- Name:
navigateFromNotification - Add an Argument named
navigateData
- Name:
Add a Run JS (in browser) handler with this code:
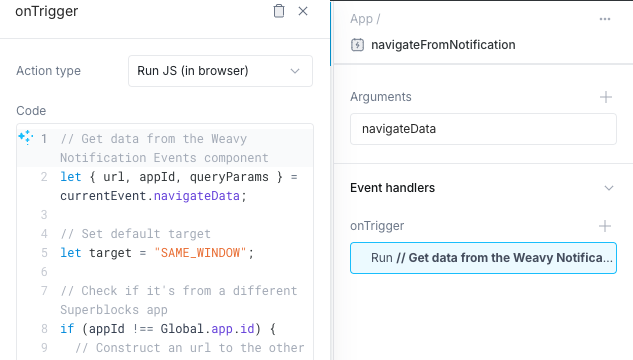
// Get data from the Weavy Notification Events component
let { url, appId, queryParams } = currentEvent.navigateData;

// Set default target
let target = "SAME_WINDOW";

// Check if it's from a different Superblocks app
if (appId !== Global.app.id) {
  // Construct an url to the other app
  url = new URL(
    "." + url,
    `https://${Global.URL.host}/applications/${appId}/`,
  ).toString();

  // Open the other app in a new tab
  target = "NEW_WINDOW";
}

// Navigate to the page
navigateTo(url, queryParams, target);
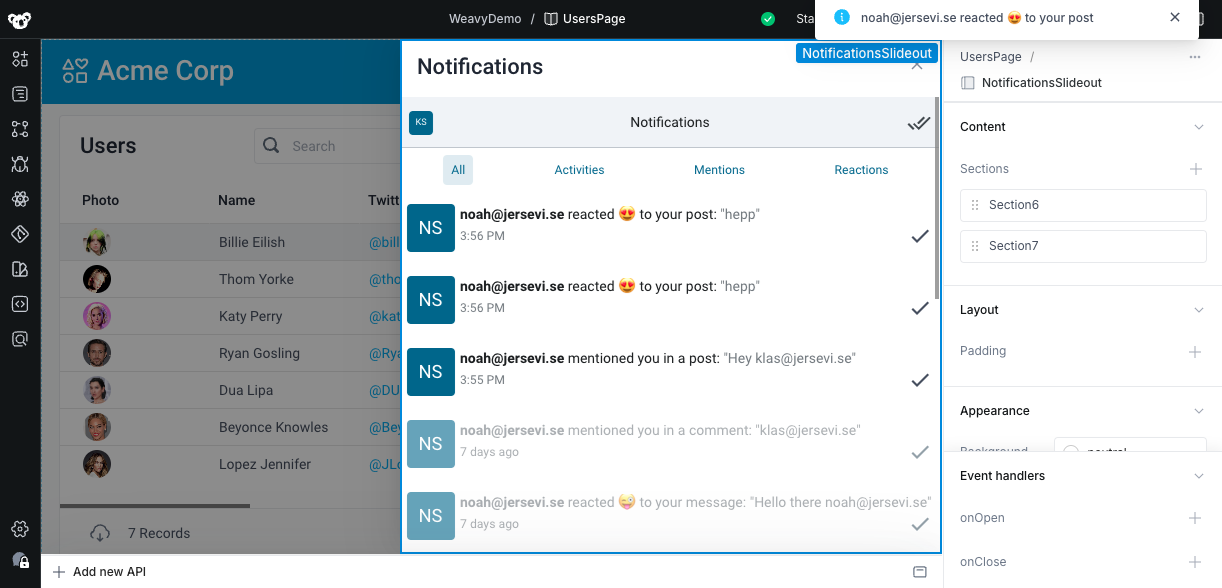
Step 4: Add the Notifications Component
- Drag a Slideout component onto your page (typically in your navigation bar)
- Drag the Weavy Notifications component onto the Slideout
- Select the Notifications component and add an event handler:
- Event: On Navigate
- Action: Trigger event
- Event:
App.navigateFromNotification - Bind
navigateDatato:WeavyNotifications1.navigateData
- (Optional) Add another handler to close the Slideout on navigation
Step 5: Add Notification Toasts
Display notifications to users in real-time:
Drag the Weavy Notification Events component onto a page that's always visible (like your Header)
- (Optional) Turn off the spinner in component properties
Choose your notification display method:
Using Weavy's built-in toasts:
- Add event handler for On Navigate
- Action: Trigger event
- Event:
App.navigateFromNotification - Bind
navigateDatato:WeavyNotificationEvents1.navigateData
Using Superblocks Alerts:
- Add event handler for On Notification
- Action: Show Alert
- Message:
{{WeavyNotificationEvents1.notificationTitle}}
Note: Alerts cannot handle navigation; use Weavy's built-in toasts for full notification functionality.
Step 6: Add Badge to Notification Button
Display the count of unread notifications:
- Select the Button for the Slideout
- Set the Label to:
{{ WeavyNotificationEvents1.notificationCount || '' }} - Add a notifications icon to the button
![]()
Step 7: Make Components Save Their Location
For the navigation flow to work, each contextual Weavy component (Comments, Posts, Files, Chat) must register its location:
For each component:
- Select the component (e.g., WeavyChat1, WeavyFiles1)
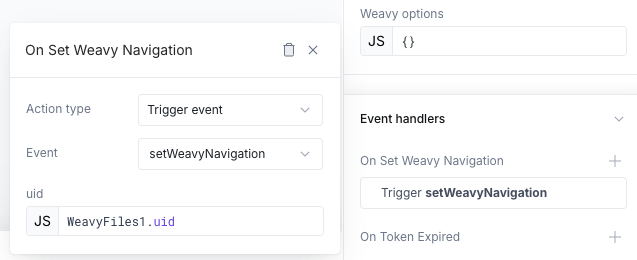
- Add an event handler:
- Event: On Set Weavy Navigation
- Action: Trigger event
- Event:
setWeavyNavigation - Bind
uidto: the component's uid (e.g.,WeavyChat1.uid)
Important: Configure your Superblocks navigation and routing before enabling this event, as
setWeavyNavigationis a one-time operation per component.
Step 8: Done!
Your notification system is fully operational! Users can now:
- Receive real-time notifications from Weavy components
- Click notifications to navigate directly to the source
- See unread notification counts
- Experience seamless notification integration
Test it: Ask a team member to @mention you in a Weavy component to see notifications in action!