Setting up notifications in your Retool app
Weavy has built-in notification handling. This guide shows how to connect it to the Retool notification system and how to navigate from notifications.
Prerequisites
This guide is built upon an app based on the Basic layout template in Retool, but you may easily adapt it to any other Retool app or layout as well.
1. Prepare your Retool app
Make sure you have a Retool app ready.
To be able to easily follow the steps here you can make an app based on the Basic Layout template.
- Go to your Apps (Home) in Retool.
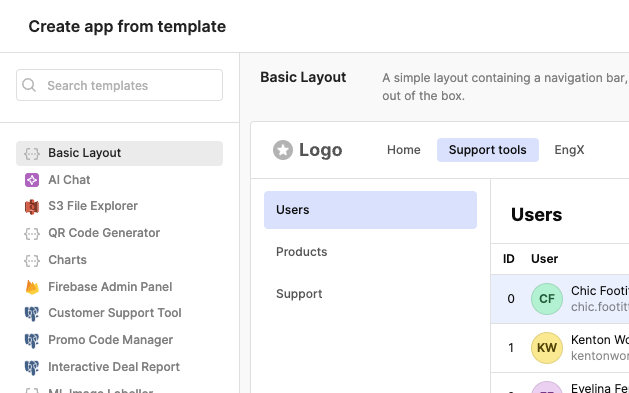
- Click Create and choose From template.
- Choose Basic Layout and click Create app from template.
2. Configuring Weavy
For this tutorial, we need the Retool app to be configured with a getWeavyToken query and the Weavy components library to be installed.
Make sure you have followed tutorial on What to do first in Retool.
3. Add notification toasts
To display a Retool notification toast whenever a realtime notification is received, we need the Weavy Notification Events to generate events that we can act on.
The component needs to be placed where it's always loaded, for instance in the Header. The only visual appearance it has is a spinner while loading.
Then we'll just connect the Notification event to show notifications.
- Make room after the
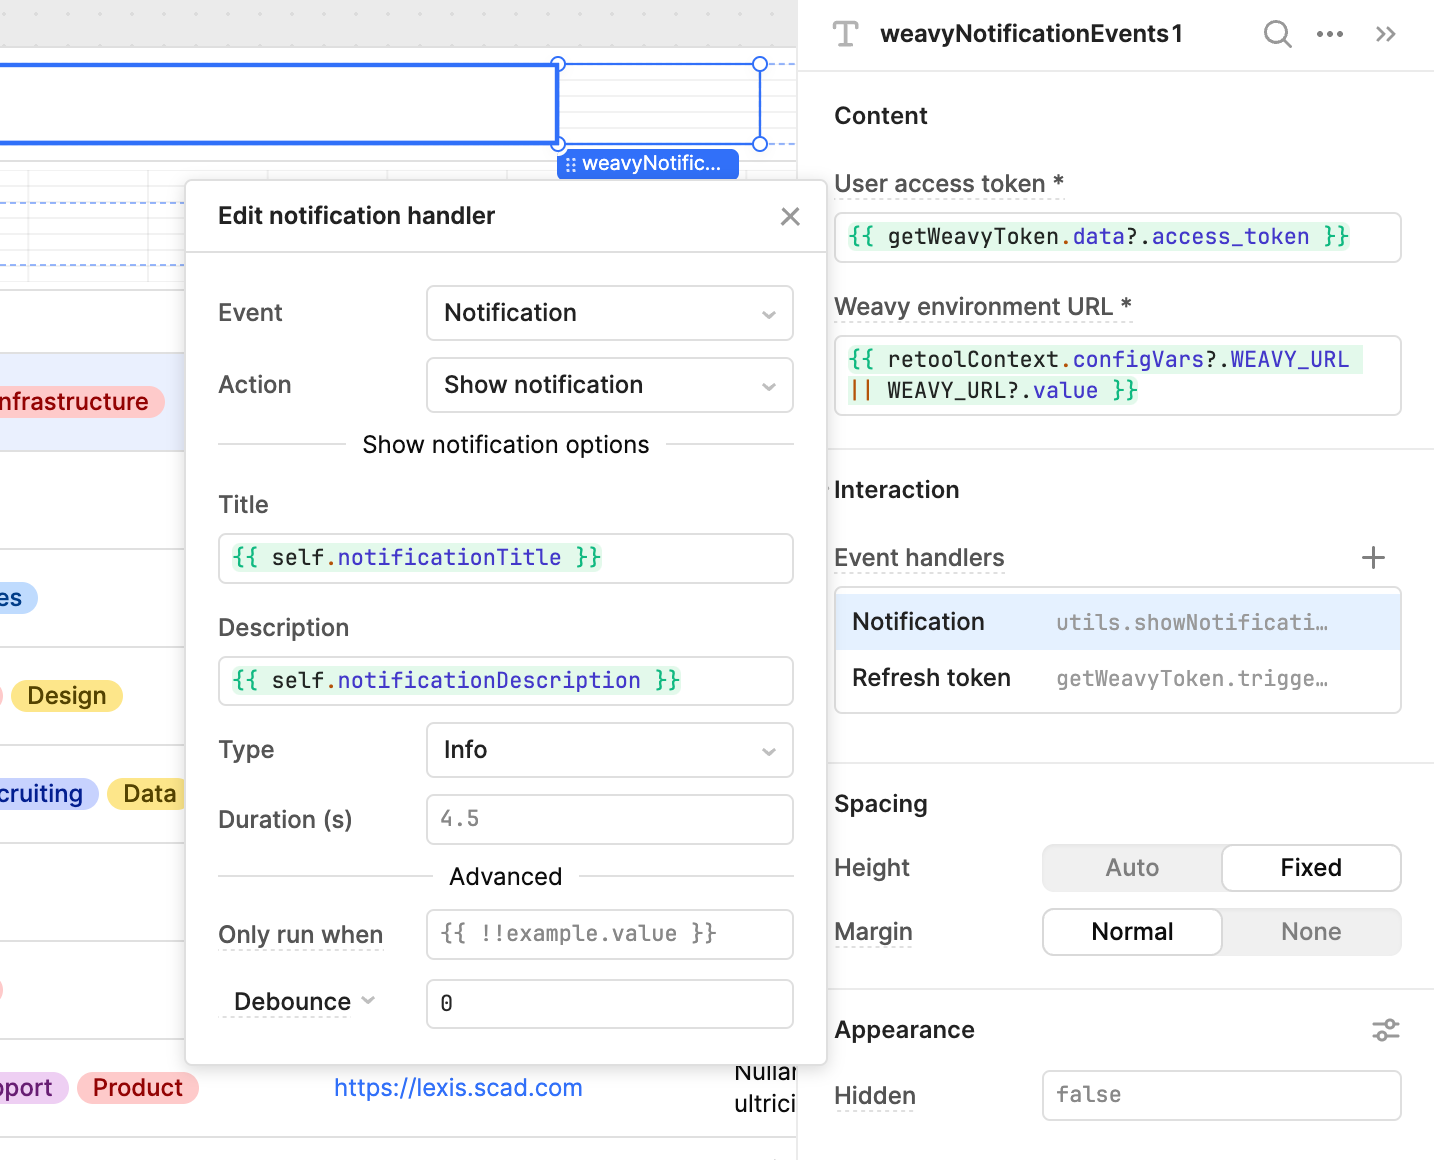
navigation1component in theHeaderand add theWeavy Notification Eventscomponent at the end of the header. - Open the Component inspector for
weavyNotificationEvents1and add an Event handler for theNotificationevent.- Set the Action to Show Notification.
- Set the Title to
{{ self.notificationTitle }}. - Set the Description to
{{ self.notificationDescription }}.
4. Configure page settings
To be able to navigate from a notification to the component where it originated from, we need to configure your Retool app to use deeplink urls. The Weavy components will automatically pick up the current page parameters and provide it later whenever a Notification is clicked.
This is done by customizing app URLs.
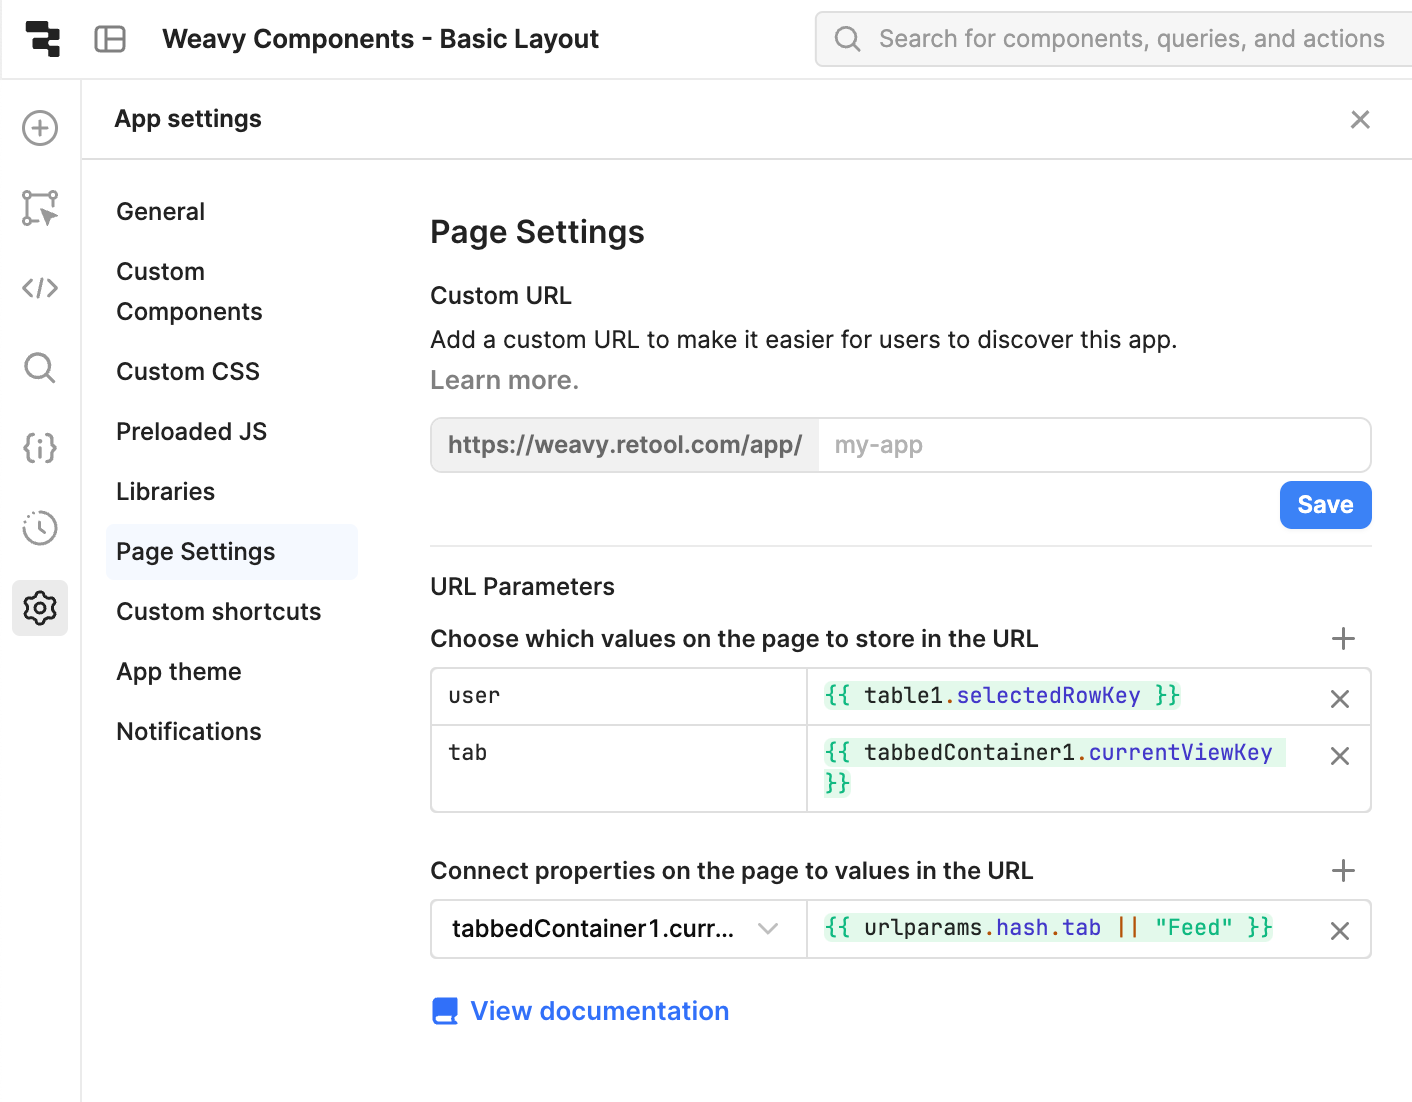
- Go to App settings > Page settings.
- Add an URL Parameter by clicking on the + on the right.
- Add a parameter called
userand set the value to{{ table1.selectedRowKey }}. This will set a user parameter in the URL of your app whenever you click on a row in the user table in the app.
To be able to receive updates in the URL, we also need to link the parameters in reverse.
- Select the user table (
table1) and open the component inspector. - Change the Default index from
0to{{ parseInt(urlparams.hash.user ?? 0) }}. This will set the index from theuserparameter in the URL whenever it changes or default it to0when it's not set. - To verify that it works, try to manually modify the number of the user parameter in the url and see the selection change in the table.
Multipage apps If you have a multipage app, the URL Parameters of the Page settings is instead located in the component inspector of each page.
5. Import the page navigation query
To be able to link our Weavy components with Notification clicks, we need to set Navigation metadata for the components. This is done semi-automatically using a workflow.
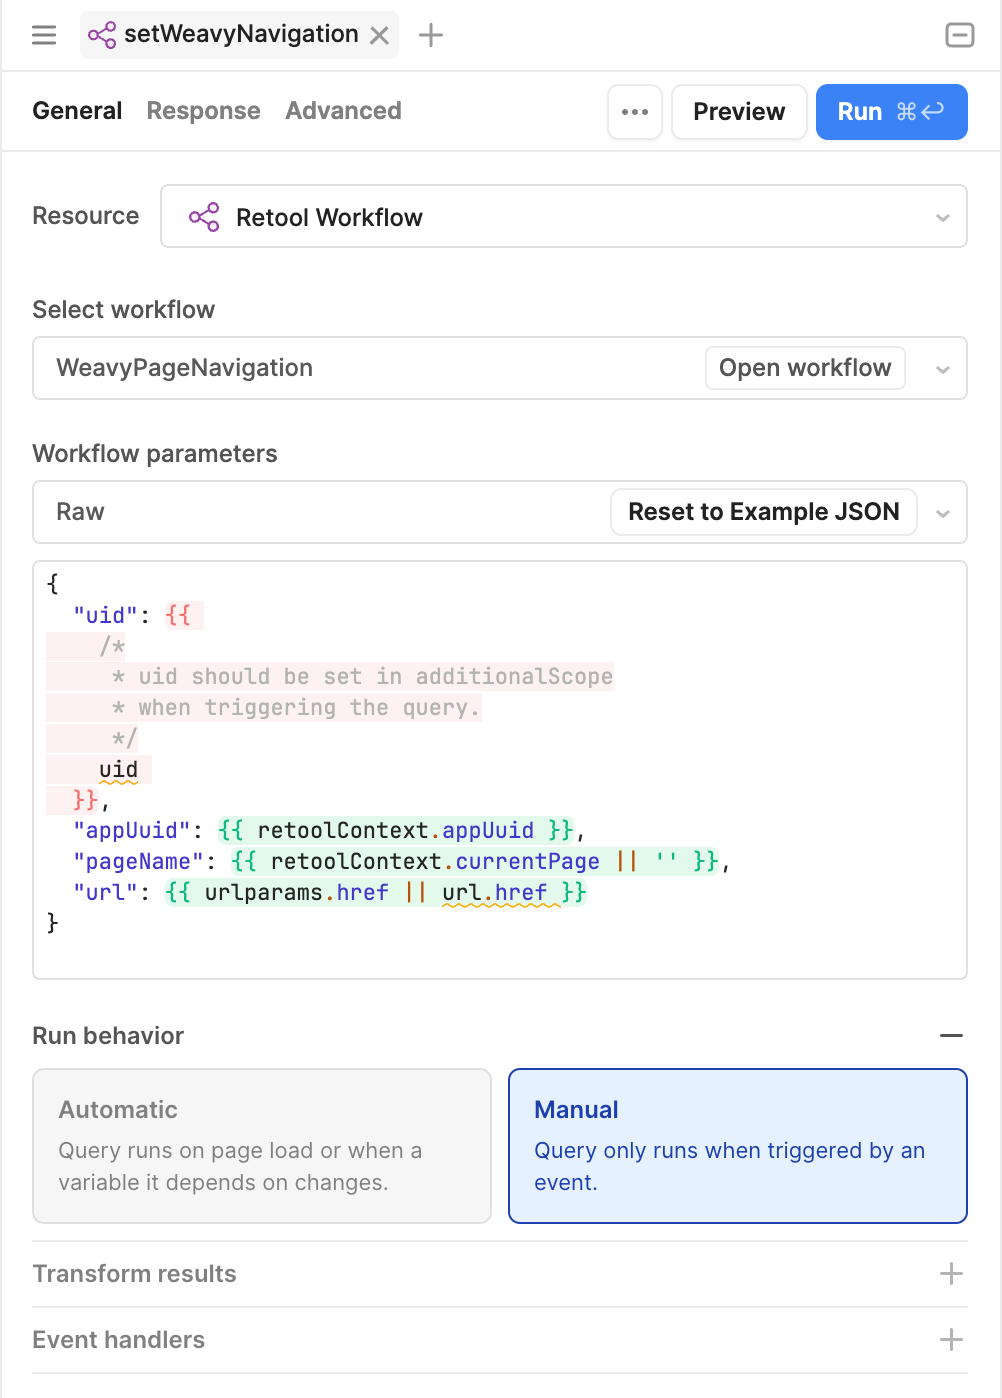
Go to Code in the left panel, click the + and select Import Workflow.
- Name it
setWeavyNavigation. - Select
WeavyPageNavigationfrom the Select Workflow dropdown. - Make sure the
Run behaviorisManual. - Click
Save. - You can't yet successfully run the query. It needs to be triggered in code using an
uidasadditionalScope.
Don't have the workflow? You need to import the workflow and install the Weavy components for this tutorial to work. Tutorial: Before you start adding Weavy
6. Trigger the navigation query
To be able to link clicks in the Notifications list back to the component that generated the content, we need to save metadata about the page and url where it's placed.
The setWeavyNavigation query will trigger a workflow that saves the data. This is usually done once for each Weavy component if the metadata isn't already set.
Do the following for all the contextual Weavy components (that has a uid) such as Weavy Comments, Weavy Chat, Weavy Files or Weavy Posts.
- Select and open the Component inspector for a contextual Weavy component, for instance a Weavy Posts component called
weavyPosts1. - Add an Event handler for
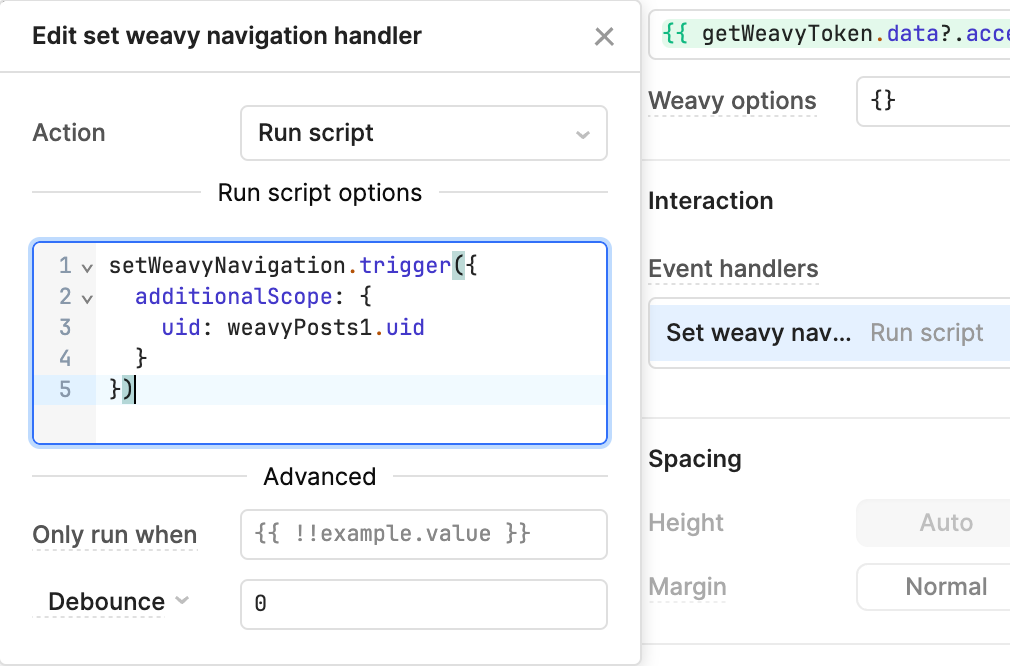
Set weavy navigationand set it to Run script. - Set the script to:
setWeavyNavigation.trigger({
  additionalScope: {
    uid: weavyPosts1.uid
  }
})
- Replace
weavyPosts1with the id of your component.