Add realtime notifications to your Refine app
This tutorial will show how to create a notification list, add an unread badge, handle navigation and provide notification toasts to your Refine powered React app using Weavy.
Have your favorite code editor ready, and let's get started!
Prerequisites
We assume you are well acquainted with the Refine API and have a Refine powered app ready. This tutorial takes advantage of Ant Design components for layout, but you may easily adapt it to other UI Frameworks as well.
You will need:
- A Weavy environment
- Node.js
- Your favorite code editor
1. Prepare your Refine app
Make sure you have a Refine powered app. For this tutorial we make use of NextJS with Ant Design.
Refine has a ready-to-go Authentication with NextAuth.js example for this.
npm create refine-app@latest -- --example with-nextjs-next-auth
2. Configuring Weavy
We need Weavy to be configured with an environment url and authentication to get the components running.
Make sure you have followed the tutorial for What to do first with Refine to configure authentication.
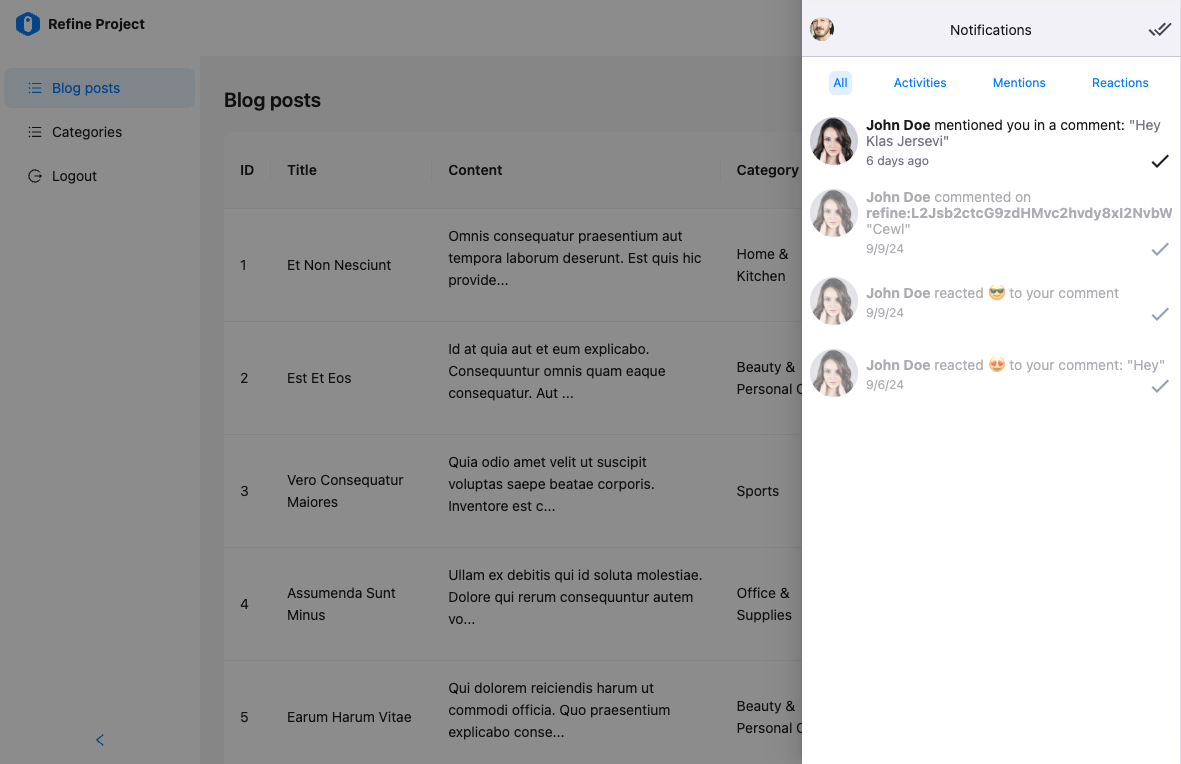
3. Create a Notifications component
We're adding the notifications list component to a drawer triggered from the navigation header. We need to add a button and a drawer. We will add a badge component to show how many unread notifications we have. We will also make use of the built-in notification system in Refine to show notification toasts.
- Create a new component in
/src/app/components/weavy/notifications.tsx. - Import a
<Drawer>component fromantdand make it use anopenboolean state. Set the initial state tofalse, so the drawer will be hidden initially. - Import a
<Button>component fromantdand make it toggle theopenstate on clicks. Set the icon attribute to the<BellOutlined />icon from@ant-design/icons. - Import the
<WyNotifications>component from@weavy/uikit-reactand place it in the drawer.
"use client"
import React, { useState } from "react"
import { Button, Drawer } from "antd"
import { WyNotifications } from "@weavy/uikit-react"

export const WeavyNotifications: React.FC = () => {
  const [open, setOpen] = useState(false)

  const showDrawer = () => {
    setOpen(true)
  }

  const closeDrawer = () => {
    setOpen(false)
  }

  return (
    <>
      <Button
        type="default"
        onClick={showDrawer}
        title="Notifications"
        // @ts-expect-error Ant Design Icon's v5.0.1 has an issue with @types/react@^18.2.66
        icon={<BellOutlined />}
      ></Button>
      <Drawer onClose={closeDrawer} open={open} styles={{ body: { padding: 0 } }}>
        <WyNotifications />
      </Drawer>
    </>
  )
}
You may need a theme provider If you already have added theming to Weavy, make sure to wrap the content inside the
<Drawer>in a<WeavyThemeProvider>to make the theme apply to the<WyNotifications>component.
4. Add the component in the layout
Now that the component is ready, we just need to add it in our navigation bar. To make everything align nicely, we'll change the <Space> layouts to <Flex> layouts.
- Open
/src/components/header/index.tsx. - Change the outer
<Space>layout to a<Flex align="center" gap="small">layout. - Change the avatar
<Space>layout to a<Flex style={{ marginLeft: "8px" }} align="center" gap="middle">layout. - Import and add the
<WeavyNotifications />component you created last in the outer<Space>layout.
5. Create a page navigation provider
To be able to navigate from Notifications to the component where their content origin from, whe need to save metadata about the pages where the are placed.
We use a provider that communicates with the Weavy API on the server side. This is done by saving page information in the app metadata.
- Create a provider in
/src/providers/weavy/navigation.ts.
This provider handles updating page metadata for Weavy apps to enable navigation from notifications back to their source components.
6. Add a page navigation hook
To simplify the use of the navigation provider, we'll create a hook that handles the page navigation provider when needed. The hook can then easily be used in components.
- Create a hook in
/src/hooks/weavy/usePageNavigation.ts.
This hook integrates with the navigation provider and automatically updates page metadata when components are mounted or when dependencies change.
7. Prepare other Weavy components
Each contextual Weavy component (components with an uid) will generate notifications that will show up in the notification list.
To be able to handle notification clicks and navigate back to the place where the component is located, we need to save the pathname of the page into the metadata of the Weavy component. The pathname is provided by the useParsed() hook in Refine. You may have to add any #hash that you want to use to the path string.
Simply connect the usePageNavigation(path, deps) hook to the ref attribute of the component.
Make sure all your contextual Weavy components are using the usePageNavigation hook.
"use client";
import { WyComments } from "@weavy/uikit-react";
import { useParsed } from "@refinedev/core";
import { usePageNavigation } from "@hooks/weavy/usePageNavigation";

export default function SomeComponent({ id }) {

  // Construct an uid
  const myUid = id ? `refine:${id}:comments` : undefined

  // Save page metadata for navigation
  const { pathname } = useParsed();
  const componentRefCallback = usePageNavigation(() => `${pathname}`, [myUid]);

  return (
    <>