Add Weavy Components to Your Superblocks App
Add powerful collaboration features to your existing Superblocks applications without replacing your current setup. This tutorial shows how to integrate Weavy components into any Superblocks app.
Prerequisites
You will need:
- A Weavy API key
- A Superblocks account with admin rights
- An existing Superblocks app (or create a new one)
- Git and Node.js installed
Step 1: Select Your Weavy API Key and Environment
Log in to your Weavy account and select an environment with an API key. You'll use this throughout the integration process.
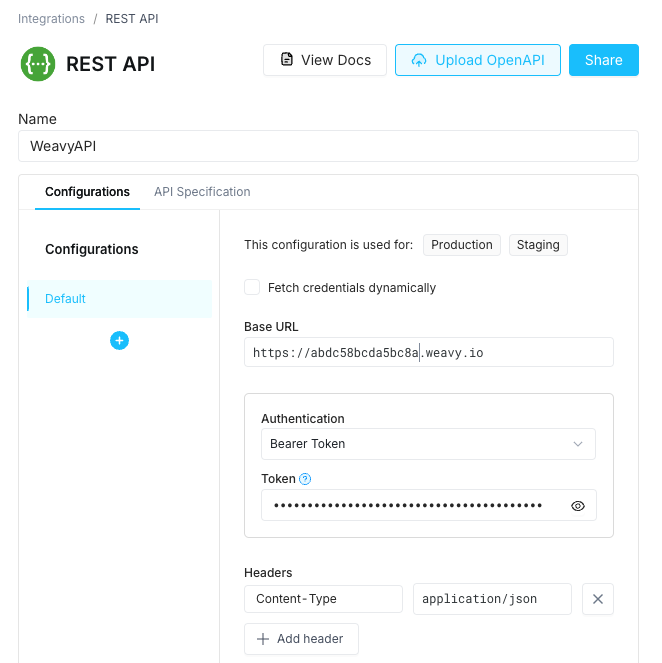
Step 2: Create WeavyAPI REST Integration
Create a REST API integration in your Superblocks app:
- Name: WeavyAPI
- URL: Your Weavy backend URL
- Headers:
Authorization: Bearer YOUR_API_KEYContent-Type: application/json
Step 3: Add Frontend Variable for Weavy URL
Create a frontend variable in your app's scope:
- Variable name:
WEAVY_URL - Default value: Your Weavy backend URL (or use
WY_BACKEND_URL) - Variable type: String
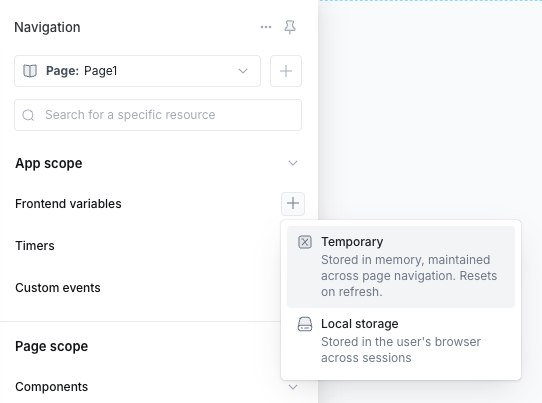
This variable will be used by the Weavy components to connect to your Weavy backend.
Step 4: Clone the Superblocks Weavy Components Repository
Open your terminal:
git clone https://github.com/weavy-labs/superblocks-weavy-components.git
cd superblocks-weavy-components
Step 5: Install Dependencies
npm install
Step 6: Authenticate with Superblocks
npx superblocks login
Step 7: Install Components to Your App
Run the interactive component installation script:
npm run create:components
This script will:
- Ask which app you want to install components to
- Ask which pages should have the components
- Automatically create necessary workflows and APIs:
WeavyAuthenticationworkflowWeavyPageNavigationworkflowGetWeavyTokenbackend APISetWeavyNavigationbackend API
- Install all Weavy components to your selected pages
Step 8: Done!
Your Weavy components are now installed and ready for configuration. All components are available in the Components panel for drag-and-drop placement on your pages.
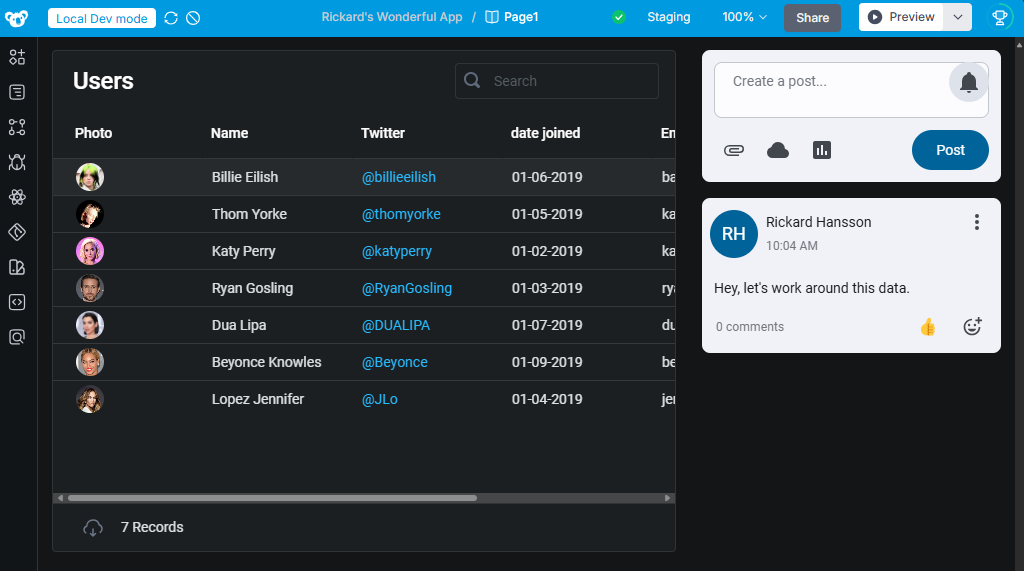
Next Steps: Configure each component with the appropriate properties (uid, display name, event handlers) to enable collaboration features in your app.